Adding stairs, or just a few steps, in your hardscape design is one of those little things that, as simple as they are, add a ton of value and refinement to your house. So how can we combine the best out of two worlds and build steps with pavers?
Stairs can actually be seen as a combination of retaining walls plus pavers. The process is not exactly easy, but certainly simple and doable, with a little planning.
We are going to talk about the materials you’re going to need. Then, we will give you a step-by-step guide on how to make steps using a simple combination of pavers and retaining wall blocks.
However, there’s one very important aspect we need to discuss before anything else: the terrain.
How to Build Steps With Pavers – Let’s Talk About Terrain
One of the most important aspects of any paver installation is the leveling of your terrain. To “level” a terrain means to form an even, smooth, leveled surface along an entire area.
This area can comprehend your entire project. But maybe, and this is very important, your project can be divided into different “sections” so that each of those sections can correspond to a different level.
Let’s be real here, leveling costs a lot of materials. Sometimes, if you have enough slope, instead of making a single patio, you can create small ones with steps between them. That can not only save you some money but add personality and uniqueness to your design.
So you are working with one of two scenarios: you either have enough slope on your terrain or don’t.
If you have a slope, good. Just include it on your design and you’re good to go. We’re going to teach how to plan for it in no time. And if you don’t have enough slope but still want some steps, don’t worry. You can create an artificial slope, and we’re also going to teach how to plan for that.
How to Build Steps With Pavers – Let’s Talk About Planning
Planning is the most important part of the process when it comes to the installation of stairs and steps.
First, you’re going to need something you can use to draw on the floor, like chalk or spray paint. With that in hand, you’re going to draw a sketch of the steps on the floor. This sketch will help you visualize the position of the stairs and will be a good guideline for the next step.
Now comes the math part. For that, you’re going to need some metal stakes, string, a level line, and a measuring tape. For starters, place a metal stake at the highest point of your path and one at the lowest. Then tie one end of the string to the highest stake and the other end all the way on the lowest stake.
That will allow you to measure the height difference between the highest and lowest point of your terrain. Don’t forget to use the level line on the string to make sure it’s leveled! If you divide the height difference by the height of the step block you plan to use, you’ll know the number of steps you’re going to need.
Don’t forget that the height of your step block is equal to the height of the retaining wall blocks you’re going to use plus the height of the pavers you’re going to place as steps afterward.
Preparation
So now that you have an idea of how your steps are going to come out, you can start digging and preparing for the actual work. First, you’ll have to dig the entire area that your stairs are going to cover.
You must dig about 12 inches below the lowest point of your steps. The hole needs to be then covered with a layer of geotextile fabric followed by a 6 inches layer of gravel and a final 1-inch layer of sand. Make sure to level each layer with the help of a hand tamper.
Once that is done, you can start placing the retaining wall blocks at the base of your stair, and this is the hardest and slowest part of the job.
Placing Retaining Wall Blocks
Basically, what you want to do, is to create a “box” for your stairs to be in. You’re going to place the first wall block on the ground and make absolutely sure is properly leveled, because all the other blocks will be leveled according to it.
Add the remaining blocks, side by side of the first one, forcing them together and making sure they are properly leveled every time. At the corner, you want to finish the “box” by adding wall blocks, this time front to back, at the last wall block, forming the corner of the stairs.
Then you add another row of wall blocks, this time taking into consideration that they are going to be your second set of steps, so your want to add them behind the first row, with some space between them, according to the size and height of your steps.
After that, you simply have to add another set of wall blocks to the second row so they are higher than the first. Repeat the process to however how many steps you have. To glue the blocks together, we recommend the use of some form of powerful masonry adhesive.
Finishing the Job
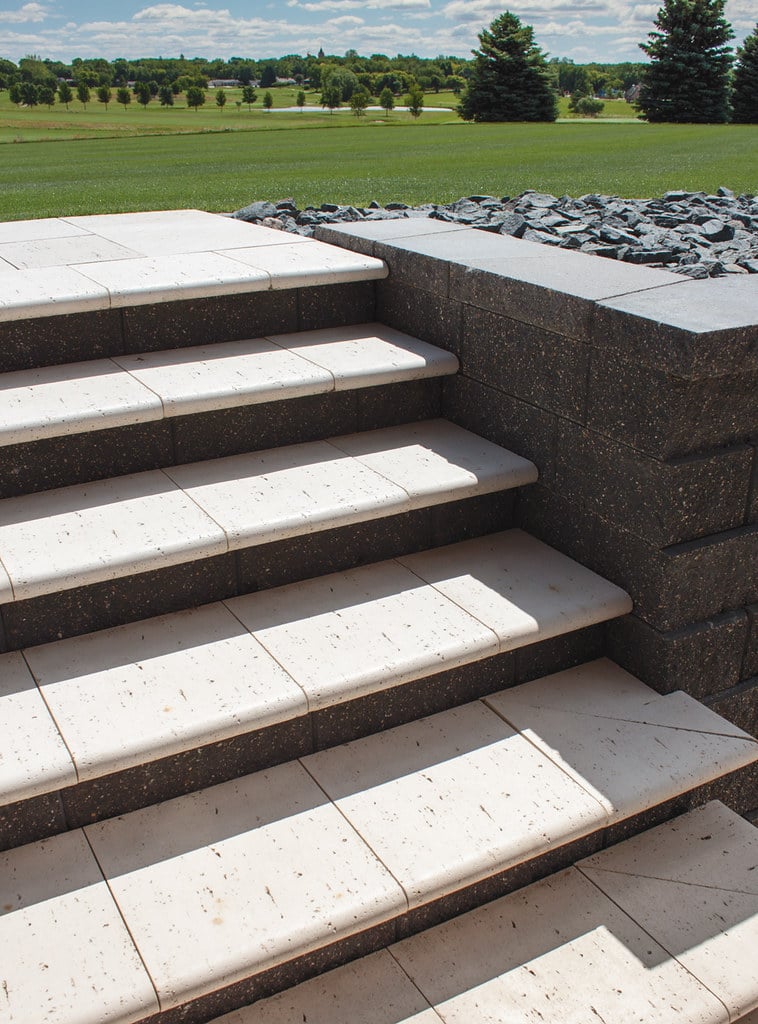
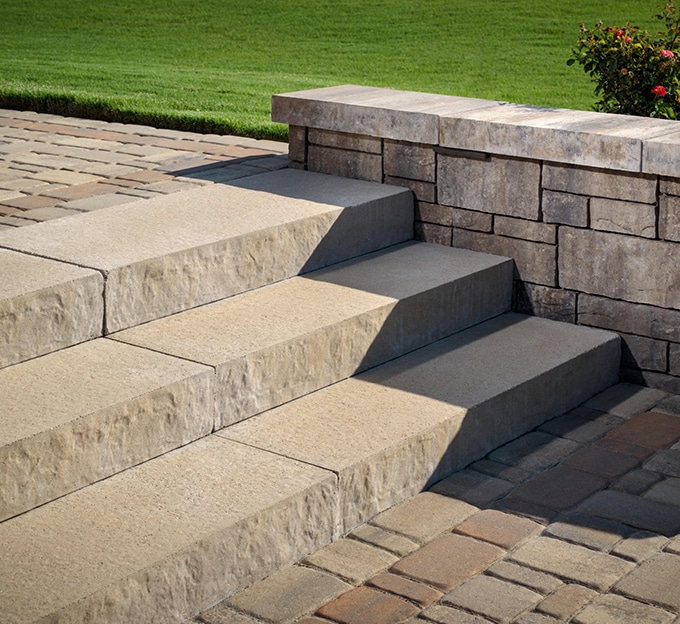
Once that is done, you want to add a lot of sand between the spaces of each row, really tightening them up together. At this point, you already have your stairs. Is just a matter of sweeping the excess sand and adding the pavers of your choice on top of the stairs.
So, as you could see, making steps involves a lot of calculations and uncertainties. Is really hard to plan and acquire an exact amount of materials, because you, honestly, can never know for sure how a step project is going to be.
If you want the best possible final product, your best bet is still to hire professionals to help bring your vision to life. If you happen to be around the Sarasota and Manatee Counties, in Fl, the best professionals on the installation and maintenance of pavers can be found at S&S Pavers.
Give them a call right now at 941-773-3098 or through the email sales@sspavers.com to schedule a visit or for an estimate on your hardscape project.