Laying patio pavers involves a lot of hard work, tools, and materials, but is not an impossible task. With planning and dedication, it can be a fun DIY project for a couple of weekends.
Few things beat the elegance and versatility of a beautifully laid paver patio, so if you feel like venturing into trying it by yourself, we’re going to provide you a step-by-step guide on how to do it.
How to Lay Patio Pavers – Materials and Tools
First, let’s go through a rundown of all the materials and tools you’re going to need.
| Tools | Materials |
| Shovel | Patio Pavers |
| Hammer and Rubber Hammer | Furring Strips |
| Measuring Tape | Nails |
| Line Level | Mason Line |
| Hand Tamper (or Plate Compactor) | Gravel |
| A Tool to Cut Pavers (if needed) Ex.: Angle Grinder, Masonry Saw | Sand and Jointing Sand |
| Level | Two 1″ Diameter PVC Pipes |
| Broom | Edge Restrainers (with spikes) |
Now that we talked about all the tools and materials involved in the project, let’s go straight for the guide on how to put them to proper use.
Step 01 – Planning and Layout
The first thing you’re going to do is to use your nails and furring strips to create a batter board. Batter boards are small structures that you’re going to stick to the ground to mark the layout of your patio with the help of the mason line. On the batter boards, you’re going to tie the mason line, but not too tight, so you can still slide it around to determine the layout.
Make sure to have a perfect square. You can check that by measuring the diagonals, if they have the same measurement, you got yourself a perfect square.
Important reminder! Don’t forget to consider the space for the edge restrains when calculating your layout. This will depend of what kind of restrain you’re planning to use, but never forget to add space for them.
With the layout planned, now it’s time for the excavation.
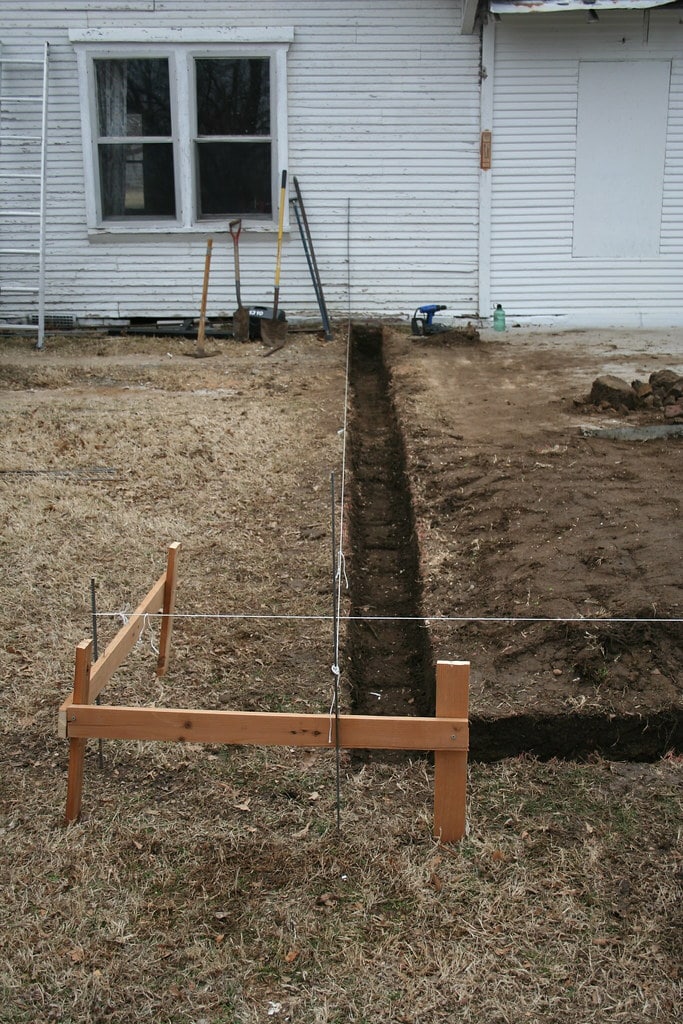
Step 2 – Excavation
Nothing too complex, just make a hole on the outline set by the mason line using a shovel. The depth of this hole is calculated using the following formula:
Thickness of the paver + 1 inch (for the sand layer) + 4-6 inches (for the gravel layer, it depends on the gravel you’re going to use).
Make sure the lines are equally leveled alongside the patio by using line levels on them. It is also important to create a slope so water doesn’t accumulate beneath the patio. This slope is created by adding a 1-inch depth every 4 feet, in the direction you wish the water to be drained.
After all the excavation is done, compact the soil by using a hand temper. If you are able to rent a plate compactor however, that will make your job a lot easier.
Step 3 – Bedding
Now is time to add all the gravel and sand to form a bed to your patio. No mystery here. Starting by adding the gravel and compacting it until the slope is uniform. Once that is done, is time to put those 1″ pipes to use.
Lay the pipes approximately 4 feet apart from each other and add the sand on top and around them. Then, using a straight edge (like a level or one of the furring strips), screed the sand alongside those pipes, placing the straight edge on top of them. The idea is that they will help you create a perfectly even 1″ layer of sand. Repeat this process until all the patio is covered in a smooth 1″ layer of sand.
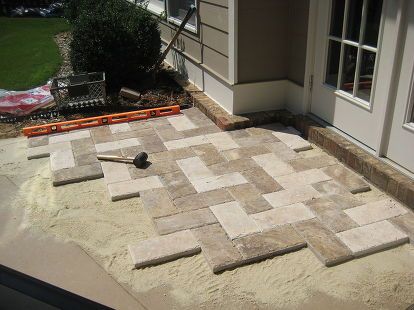
Step 4 – Lay the Pavers
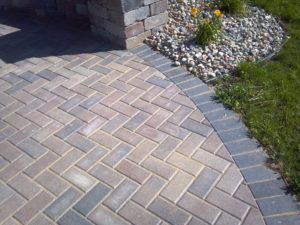
It is finally time to lay the pavers of the beautiful foundation you just created. There is a lot of ways you can do that, depending on what patterns you want to follow (here are some ideas) and on the previous planning you did when buying your pavers.
Of course, you have complete creative freedom to lay the pavers any way you want. Just don’t forget to properly space them from each other. Depending on what kind of pavers you buy, they will be accompanied by spacers to make that job easier, otherwise, simply spacing them 1/4 of an inch from each other will do the trick.
Also, be mindful that, depending on the design you want, you’ll have to be prepared to cut some pavers using a proper tool. If all you’re going to need are straight cuts, in this article we present some possibilities to do these cuts without the need for a saw. However, if the cuts are more complex, you’re to need some for a saw, the most common type for this kind of job being an angle grinder.
One way you can lay your pavers is by starting in the center and working your way to one edge at a time. However, the safest way to do it is by starting on a hard edge, if you have one. If you have really good planning, you can check the next step to install one edge restrainer and start working from it.
Use a level as you go along to check for the straightness of your pavers and use the rubber mallet to set them in place if necessary.
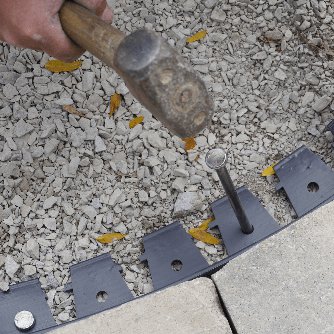
Step 5 – Installing the Edge Restrainers
Be sure to buy edge restrainers that already come with the spikes to fix them in place. They are very easy to install, just set them at the edge of your patio, as close and tight as possible to the pavers, and fix them on the ground by hammering the spikes on the ground
We’re recommending these types of edges because they are easier to use on a DIY project, but there’s a lot of different types of techniques and materials you can use for that part of the job.
Step 6 – Finishing Touches
To finish your project you are going to throw a good amount of jointing sand on the whole patio. First, make sure your pavers are completely dry. If they are, you have a green light to add the sand between them, using a broom to help you sweep the sand all over the surface of the patio.
You can be very generous with the sand, completely filling the joints and reapplying it until it has no more room to go, which at this point you can sweep it off and pat yourself in the back because your job is done! Congratulations.
Call for Professional Help
Sure, as any DIY project goes, it can be really fun and satisfying to create something on your own. But if you really care about a job perfectly well done, with all the variables accounted for and with the minimum amount of risk involved, it is worth calling professionals to do that job for you.
If you’re around the Sarasota and Manatee counties, you can find the best professionals at S&S Pavers. With more than 10 years’ experience, they are ready to make your hardscape vision become a reality. Give them a call at 941-773-3098 for a free estimate.