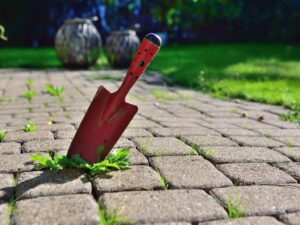
Paver installations are one of the most hardscape elements in the market today. But for all its popularity, many people still don’t know about the importance of an apparently simple element: the paver leveling sand.
The goal of this article is to finally give this important piece of the hardscape puzzle its deserved time in the spotlight. Let’s discuss the role of the paver leveling sand in an installation and what makes it so important.
Paver Leveling Sand: What Exactly does it do?
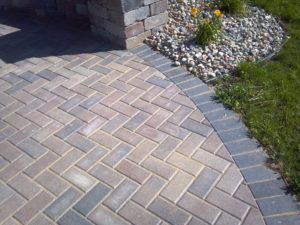
Pavers are strong, little tiles of concrete, natural stone, or porcelain that work together to create a strong structure that can withstand the heaviest of weight and last a lifetime.
What allows them to work together is the sand – in between the joints of each other, with the polymeric sand, and beneath them, with the paver leveling sand. It is thanks to them that the magic of a paver installation actually happens.
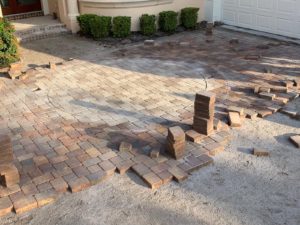
Everything starts at the base. Installations with proper slope, drainage, and a strong base can last for decades without causing any trouble.
The sand that goes on top of this base is just as important as any other aspect of the installation. In the next section, we will teach how to best use it.
Applying Paver Leveling Sand
You start by choosing if you want to put down a layer of landscape fabric on top of your base before applying the sand. Although this is optional, it is an excellent idea that we definitely recommend.
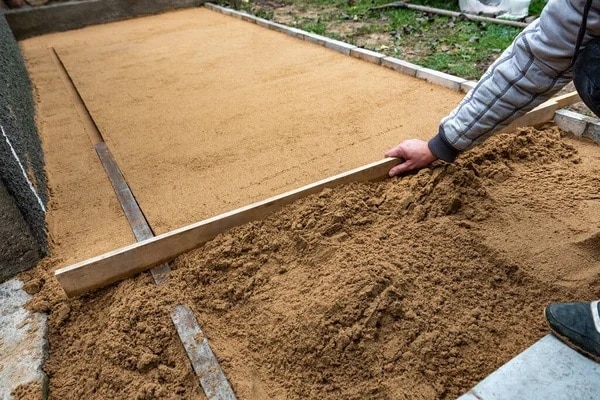
Landscape fabric or not, there are two essential tools that you’re going to need to apply the sand: Two 1″ steel pipes and a 2×4.
The idea is that you have to spread enough sand to create a 1″ layer of it across your entire installation. On top of that layer is where you will be placing your pavers. The 1″ steel pipes are going to serve you as a guide to do that.
First, divide your installation into small sections that you can easily work on. Place the pipes parallel to each other at a close enough distance to place the 2×4 on top of them. This will create a kind of “rail” system in which you will be able to move the 2×4.
You’ll have to spread the paver leveling sand on top and around the pipes and screed it with the 2×4. This will create a perfectly 1″ layer of sand across your entire installation.
After finishing one section, you simply carefully move the pipes, place them in another section and repeat the process until your entire worksite area is covered.
Upon finishing that step, you are free to start placing your pavers.
How and Where to Buy Paver Leveling Sand
Finding a place to buy paver-leveling sand is not a problem. There are many options in the market that you can choose from, and you can find many of them in any hardscape or hardware store.
What’s important is knowing how much sand you’re going to need for your project. As a rule of thumb, a bag containing 14 liters (1/2 cubic feet) is enough to cover a 4 square feet area with a 1-inch deep layer.
Simply measuring your installation and dividing it by 4 will give you a rough estimation of how many bags you’re going to need.
Alternatives to Paver Leveling Sand
Many people choose to use other forms of sand for this job. We don’t really recommend that.
A paver installation is an important investment that can up to 30% of the value of your property, so it should be treated as such. Every single element should be the best possible to ensure a successfull installation.
Using other cheapest alternatives can save you some money upfront, but they will cost you in the long run. Road base, paver leveling sand, and polymeric sand should be treated with the same importance as the pavers themselves.
Ask for Professional Help if You’re not Confident
As with other paver installation elements, things are not so complex that they cannot be performed in a DIY capacity. As long as you plan carefully, don’t try to cut corners, and are 100% sure of what you’re doing, things will be ok.
But that’s just the thing. Every installation has its own characteristics and challenges. Something that looks simple, like the sand you’re going to use beneath the pavers, can actually become much more complex. Paver leveling sand is just an example.
That’s why the best course of action is to hire a professional to give you a hand with your project. As we mentioned, pavers are a costly investment that should be taken lightly, and working alongside a professional ensures that you won’t be wasting any valuable resources.
We here at SS Pavers, over our 12 years in the business, have dealt with many homeowners in this situation. We always recommend hiring a professional in your area whom you can trust.
And if you happen to be around our area of activity, the Sarasota and Manatee counties, in Florida, why not give us a call to help you out?
You can contact us any time for a free estimate on our services. Call us right now at 941-773-3098 or email us at sales@sspavers.com. We would be more than happy to help you with any hardscape needs you might have.