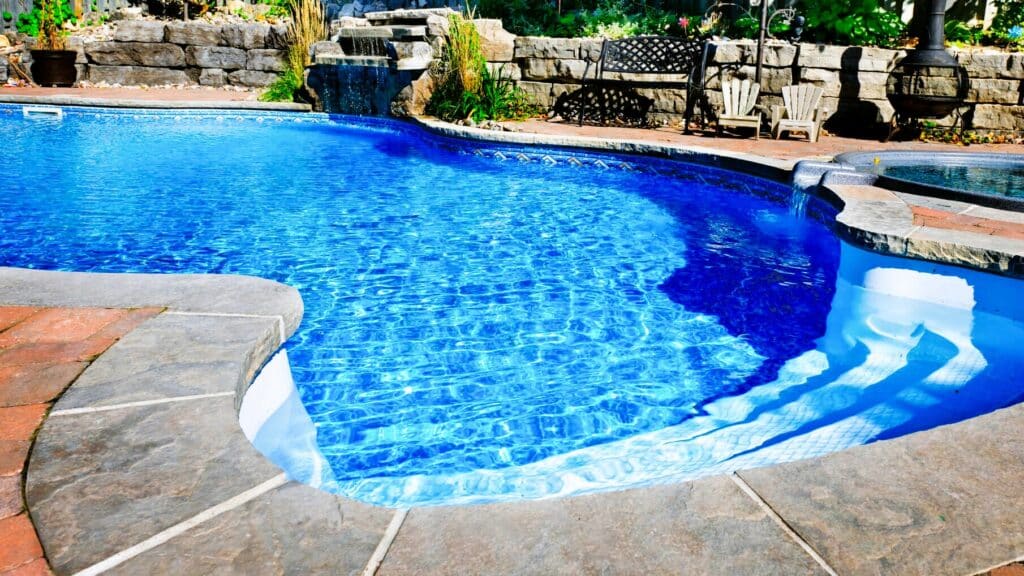
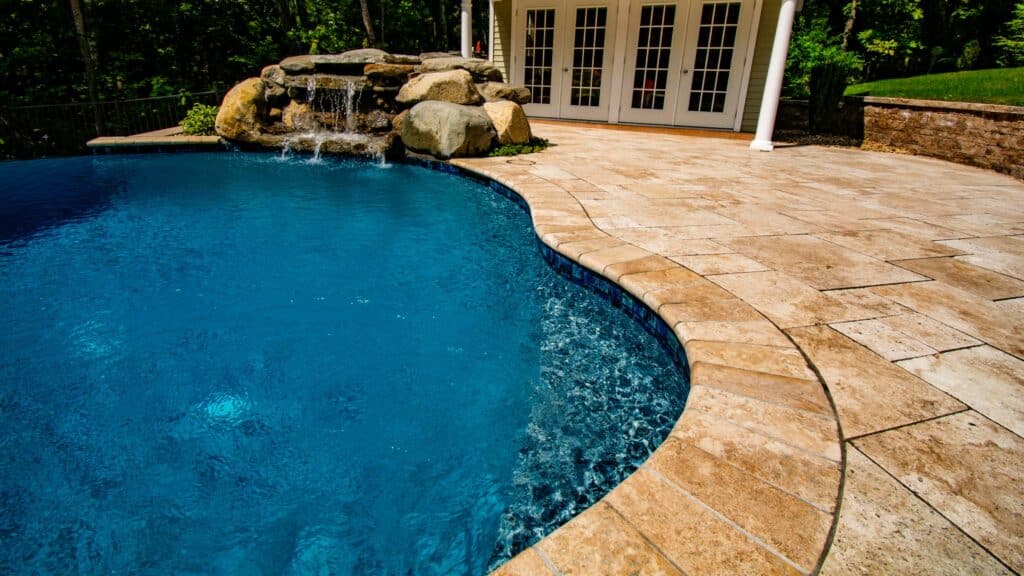
In the hardscape world, few things add as much luxury to your home as a pool. The investment can add tremendous value to your property, and it is a dream of many homeowners. However, not many people know the importance, or even how to install, pool coping pavers.
Installing pool coping pavers can transform your pool area into a stunning oasis, while also providing functional benefits such as improved safety, durability, and ease of maintenance. Coping pavers not only add a decorative touch but also serve as a protective barrier between the pool and its surroundings.
In this step-by-step guide, we will walk you through the process of installing pool coping pavers, ensuring a successful and aesthetically pleasing result.
How to install pool coping pavers: choice of material
When choosing coping pavers for your pool area, consider the different materials available and their respective advantages. Common options include natural stone, concrete, brick, and porcelain.
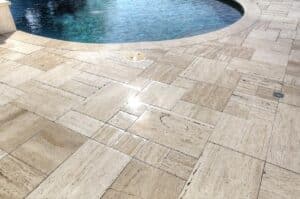
For instance, natural stone pavers like travertine or limestone can create a timeless and elegant look, with their natural colors and textures. Concrete pavers offer versatility and durability while allowing for various design possibilities.
Brick pavers provide a classic and rustic charm, and porcelain pavers are known for their strength, low maintenance, and wide range of colors.
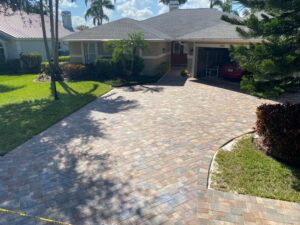
Consider the color scheme and texture of the coping pavers to ensure they complement your pool area’s overall design and theme. Look for colors that harmonize with the surroundings, such as earth tones for a natural look or cooler shades for a contemporary feel.
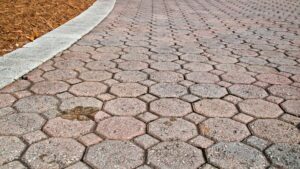
The texture of the pavers can also contribute to the aesthetic appeal and safety of the area. Smooth pavers provide a sleek appearance, while textured or tumbled surfaces offer a more rustic and slip-resistant option.
Lastly, consider your budget and the long-term maintenance requirements of the coping pavers. Some materials may have a higher initial cost but require less maintenance over time, while others may be more budget-friendly but require regular sealing or upkeep.
Factor in the lifespan of the chosen materials and the effort you are willing to invest in maintaining the pavers’ appearance.
With your pavers chosen, measure the dimensions of your pool perimeter and calculate how many will be needed. It’s recommended to order a few extra pavers to account for any errors or breakage during the installation process.
How to install pool coping pavers: step-by-step
Step 01: Preparing the base
Begin by marking the perimeter of the pool area, and then excavate the soil to a depth of about 6 inches. Use a shovel to remove the soil, ensuring a smooth and even surface. Pay attention to any sloping or grading requirements specified by local building codes or pool design guidelines.
Once the excavation is complete, check the levelness of the area using a level. Ensure that the excavated area slopes away from the pool, allowing for proper drainage and preventing water from pooling around the pool edge. A slope of approximately 1/8 to 1/4 inch per foot away from the pool is recommended.
To create a stable foundation for the coping pavers, compact the soil thoroughly. Use a tamper or plate compactor to compress the soil, ensuring it is firm and solid. This step helps prevent settling and unevenness in the future.
Once the soil is compacted, add a layer of crushed stone as a base material. The crushed stone acts as a stable and porous foundation, promoting proper drainage and preventing the pavers from shifting.
The thickness of the crushed stone layer will depend on the specific recommendations for your project, but a thickness of 4 inches is generally suitable.
Use a plate compactor to compact the crushed stone layer. Start at one end of the area and work your way systematically to ensure even compaction. The plate compactor helps eliminate voids and creates a solid, level surface for the coping pavers.
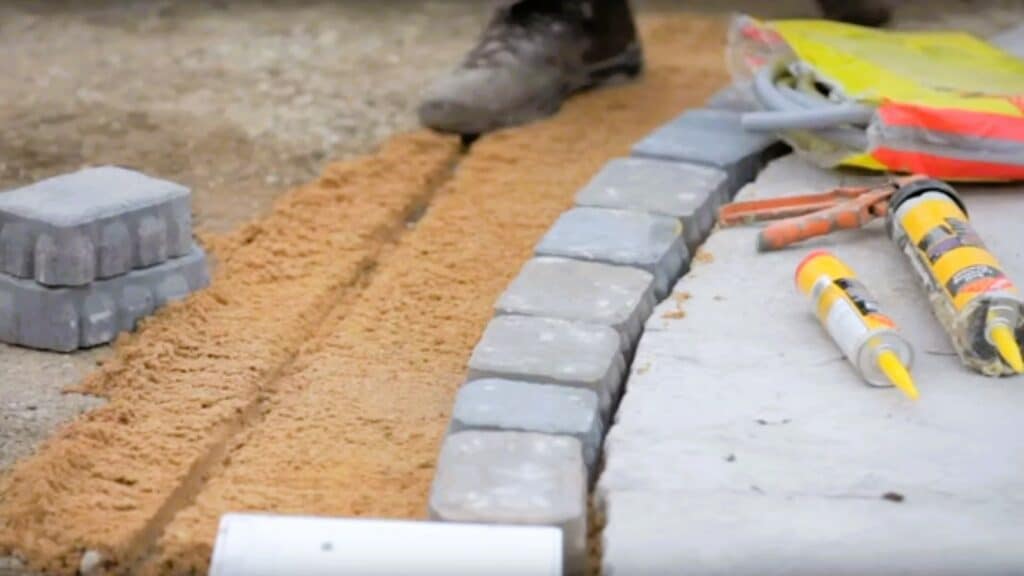
Step 02: Setting the pavers
Prepare the mortar mixture according to the manufacturer’s instructions. Typically, you must mix mortar with water until it reaches a thick, workable consistency.
Spread a layer of mortar on top of the compacted crushed stone base using a trowel or a mortar scoop. Start at one end of the pool area and work in small sections to prevent the mortar from drying out before placing the pavers.
Carefully place the coping pavers onto the mortar bed, starting from one corner of the pool and working your way around.
Ensure that the pavers are level and aligned with the pool edge, maintaining a consistent gap between each paver. The size of the gap may vary based on your design preference, but a gap of 1/8 to 1/4 inch is commonly used.
As you place each paver, use a level to check for evenness and alignment. Adjust the position of the pavers as needed, gently tapping them into place with a rubber mallet. This helps ensure that the pavers are securely set in the mortar and provides a uniform surface.
Pay attention to the joint spacing between the coping pavers. Using spacers or tile wedges can help maintain consistent gaps between the pavers and create a professional-looking finish. Remove any excess mortar that may seep up between the pavers to maintain clean and neat joints.
Step 03: Sanding the pavers
After setting all the coping pavers, it’s crucial to allow the mortar to dry and cure properly.
Follow the manufacturer’s instructions for the specific drying time, but typically, it is recommended to wait at least 24 hours before proceeding with the joint filling process. Avoid any foot traffic or excessive pressure on the pavers during this curing period.
Once the mortar is dry, it’s time to fill the joints between the coping pavers with polymeric sand. Ensure that the paver surface is dry and free of debris. Pour the polymeric sand onto the paver surface and use a broom or brush to sweep it into the joints.
Once the joints are filled, use a plate compactor or tamper to vibrate the pavers, allowing the sand to settle and compact. Follow the manufacturer’s instructions for activating the polymeric sand, typically involving a light misting of water to initiate the hardening process.
Step 04: Sealing the pavers
Sealing the pool coping pavers is an essential step to enhance their longevity, protect them from stains, discoloration, and weathering, and simplify future maintenance. The sealer creates a protective barrier that prevents the intrusion of water, chemicals, and dirt into the pavers.
Select a sealer specifically formulated for the type of coping pavers you have installed. Different materials, such as natural stone, concrete, brick, or porcelain, may require different types of sealers. Consult with the paver manufacturer or a professional to determine the most suitable sealer for you.
Before applying the sealer, ensure that the coping pavers are clean and dry. Remove any debris, dirt, or residue from the surface using a broom, blower, or pressure washer. Allow the pavers to dry completely before proceeding with the sealing process. If necessary, follow any specific cleaning instructions provided by the sealer manufacturer.
The application of sealers usually involves pouring the sealer into a roller tray or using a sprayer or brush to apply it directly onto the paver surface. Start at one end of the pool coping area and work your way systematically, ensuring even coverage.
But, to be sure, always check and follow the manufacturer’s instructions for the application of the sealer.
After applying the sealer, allow it to cure according to the manufacturer’s instructions. Curing times can vary depending on the sealer type and environmental conditions. Typically, it takes a few hours to a day for the sealer to dry and form a protective layer.
Professional help installing pool coping pavers
Installing pool coping pavers can transform your pool area, providing an elegant and functional space for relaxation and entertainment. By following this comprehensive guide, you can successfully install coping pavers and enjoy their benefits for years.
However, as you could see, the process is not exactly trivial and can be a little bit too much to tackle from a DIY perspective. That’s why we always recommend hiring professional hardscape contractors to help you with your project.
We here at S&S Pavers have helped countless homeowners with their pool-coping projects over our 13 years of activity, so we know firsthand how tricky things can get and the importance of a job well done.
So if you happen to be around our area of activity, the Sarasota and Manatee counties, in FL, get in contact with us for a free estimate on our services, so we can start helping you today!