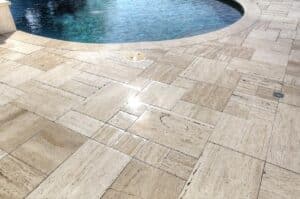
Sealing pavers is one of the most important maintenance elements you can perform on your paver installation. It ensures your pavers will be protected against stains and the grout lines protected against weed growth. So, how to clean concrete pavers before sealing?
Ideally, sealing should be applied at the moment of the installation, right before the addition of the joint sand. But if some time has passed, you might have to perform a thorough cleaning of your patio prior to sealing it.
In that case, we’ll give you a comprehensive guide on how to perform that cleaning to leave your pavers looking good as new before sealing them.
How to Clean Concrete Pavers
We will give you a guide based on the worst possible scenario, with very dirty pavers that need a deep cleaning. So, depending on the state of your pavers, some of these steps you’ll be able to skip.
We recommend you follow the guide as we move along anyway. But if you don’t have weeds, moss or mold problems, your job will be easier.
Step 01 – Clear Out the Space and Protect Plants
Remove any furniture and potted plants from your paver installation. Also, if you have any plants near it that you want to protect, now is the time. Simply cover them with a canvas or any plastic-like protection.
We will not be using any harsh chemicals or acidic substances to clean the pavers, but even mild products can sometimes be harmful to plants.
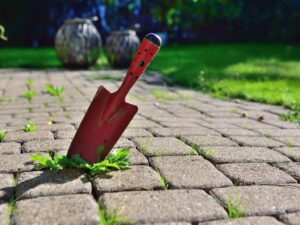
Step 02 – Clean Weeds
If you have a weed problem on your installation, that’s where your cleaning start. We don’t recommend pulling up weeds, not even using tools designed to clean weeds. You can never know how deep the roots of the weeds can go, and pulling them can compromise the base of your installation.
Instead, we will offer you three option you can use to kill weeds.
- Boiling Water With Salt
Simply boil water in a kettle and add some tablespoons of salt, roughly two for each liter. Pour the water on the grout lines, directly on top of the weeds. - Baking Soda
Another easy solution. Simply wet the weeds a little and then add the baking soda on top of it. Leave it for about 15 minutes. - Pressure Washing
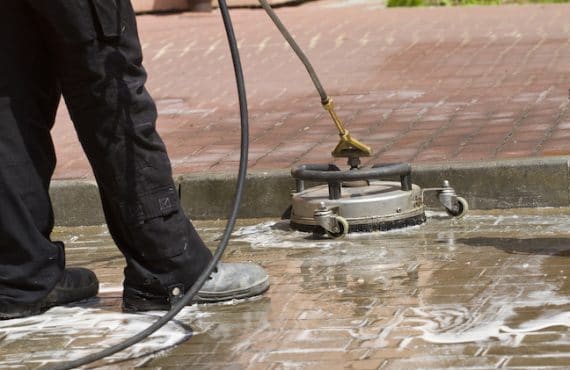
Pressure washing is going to be one of your best friends during paver cleaning. In fact, if you get one, you kinda don’t need anything else. Just be mindful of not using too much pressure with it.
Start with the lowest possible PSI and then slowly work your way up. Also, the use of a rotating surface cleaner attachment on your nozzle is highly recommended, as it has less chance to damage the pavers.
Simply aim it at the weeds and watch it as the pressured water destroys them completely, leaving it easy to be washed away or swept afterwards.
Step 03 – Cleaning Moss and Mold
With the weeds dealt with, nor is time to tackle moss and mold. Moss is removed basically the same way weed is. If they are still bothering you after cleaning up the weeds, simply repeat the cleaning process you choose until you’re free of them.
As for mold, it can be a little more complicated. Mold is more resistant than your common weeds and moss, so you might need something stronger to get rid of them if they didn’t disappear with the pressure washer, boiling water or baking soda.
Still trying to keep things as natural as possible, we’re going to recommend the use of white vinegar to clean up the mold. But be careful! Use only white vinegar, and only diluted in a solution of equal parts vinegar and water.
Also, make sure to mix the solution in a container where you have full control of the flow of water, and ideally a small flow, like in a kettle or a garden pump.
Before committing to this method, first test it on an inconspicuous part of your paver installation to make sure vinegar won’t damage them. This is a riskier method, so be careful with it.
Step 03 – Wet the Pavers
This does not necessarily mean you should “wash” the paver with water. The objective here is to simply douse them, with a garden hose or buckets of water. This is done to prevent the pavers from absorbing the cleaning solution you’re going to use.
Step 04 – Preparing the Cleaning Solution
We always recommend to use non-acidic mild cleaning solutions. There are several specialized pavers cleaning products options available in the market, but you can always make a mixture of water and mild degreasing detergent.
Fill about a gallon of warm water in a bucket and add around 16oz of detergent. Mix it well and slowly pour into the pavers, one small section at a time.
If you choose to go for a specialized products, make sure to always follow the instructions on the label.
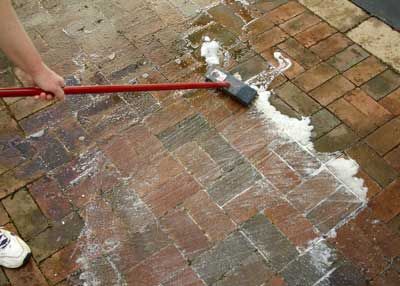
Step 05 – Scrub the Pavers
Time to finally start scrubbing your pavers using a stiff brush. We don’t recommend the use of wire brushes or scouring pads, these can damage the pavers. Make to scrub your pavers in all direction to get rif of all the dirt.
Step 06 – Rinse the Area
To top it all off, time to thoroughly rinse down the area with a garden hose or power washer set on lo psi. The entire cleaning solution and dirt needs to be completely cleaned off to avoid the accumulation of water filter on the surface of the pavers.
Sealing Concrete Pavers
And there you go. Now you left the pavers to try for a day or two, and they are ready to be sealed.
Be mindful that, if you choose to use a pressure washer, you’re probably going to have to re-sand your pavers before sealing them.
A good option to do everything all at once, in a single package, is to hire professionals to help you with both the cleaning, re-sanding, and sealing of your pavers. This is a very common service offered by many professionals in the hardscape business.
And here at S&S Pavers, is not different. We’ve been offering that service for the past 10 years with a high satisfaction rate from our customers.
If you are in the Sarasota and Manatee Counties, in FL, give a call any time at 941-773-3098 or email us at sales@sspavers.com for a free estimate on our services. We would be happy to hear from you.